

Blog, Interactive Activity Books
Strengthening hand muscles before writing: 12 activities and a weekly plan
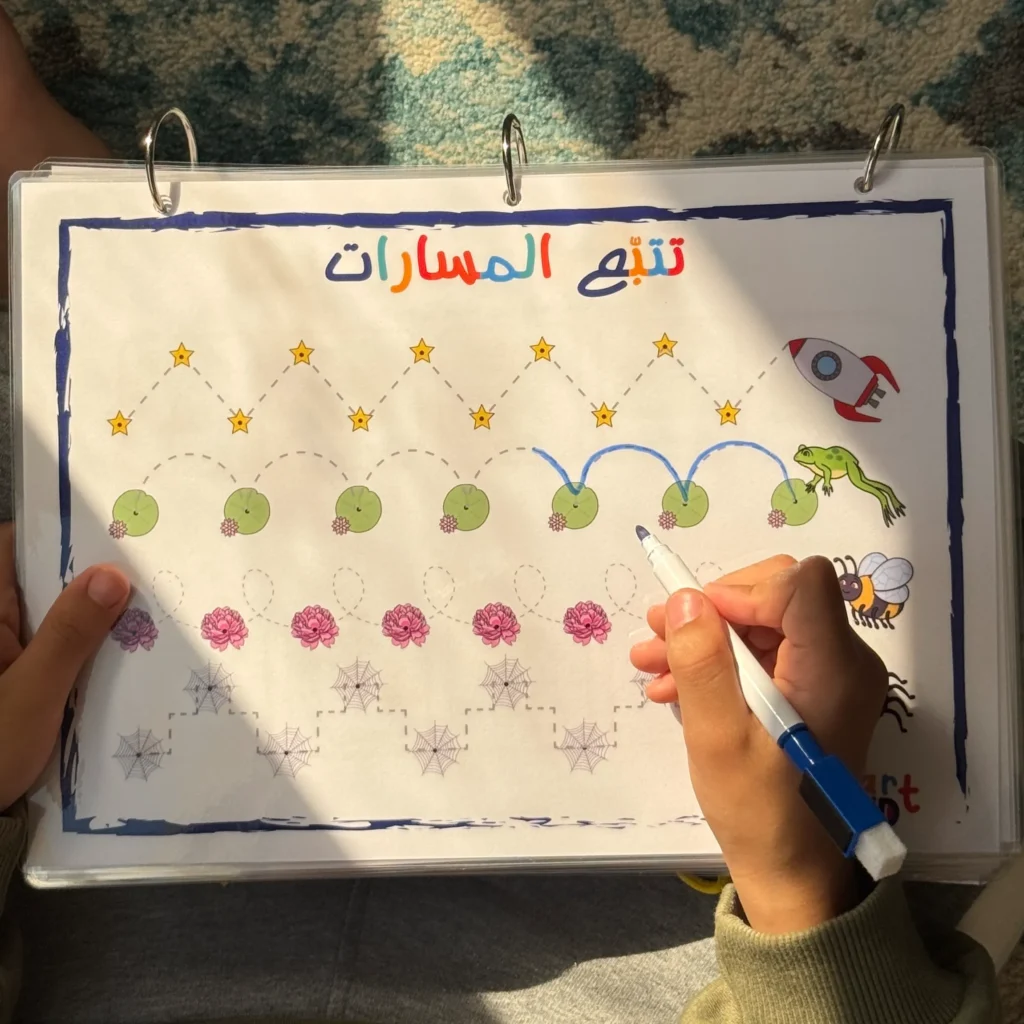
Readiness for writing begins before the pencil. A child needs a steady trunk and shoulder, comfortable wrist movement, strength in the hand, the ability to use thumb and index finger together, and hand–eye coordination. These foundations can be built through play and household tasks, then moving gradually from the fingers to tools and then to the pencil.
This guide is not a medical test and doesn't assume a single age for all children. If your child is in pain, has lost an acquired skill, or has a persistent and obvious difficulty using one hand, consult your child's doctor or an occupational therapist.
Why do hand skills come before writing?
Writing is a fine movement but depends on the whole body. When a child sits steadily, they can use their arm and hand freely. And when the muscles of the palm and fingers get stronger, they can control the pressure instead of squeezing the pen. They also need to separate finger movement from shoulder movement, follow with the eyes what they see, and move in different directions.
Pushing a child to copy letters before these foundations may turn writing into an exhausting task. That doesn't mean keeping the pen away, but presenting it within a wide progression: dough, tearing, picking up, tongs, big drawing, lines, then symbols and letters when your child is ready.
Early signs of readiness to use a pen
- Sits at a table or on the floor with reasonable steadiness for minutes.
- Uses both hands together; one holds and the other works.
- Picks up relatively safe small pieces with thumb and index finger.
- Opens a simple box or turns thick pages one at a time.
- Imitates a vertical or horizontal line or an approximate circle.
- Can control force and doesn't tear the paper with every attempt.
- Asks to draw or returns to it by choice.
Not all the signs need to appear at once, and don't force your child into a “perfect” pen grip. The grip develops gradually, and what matters most at first is comfort, control and the ability to continue without pain.
The practical progression: fingers → tool → pen
| Stage | Goal | Examples | When do we move on? |
|---|---|---|---|
| Fingers and hand | Strength, sensation and isolation | Dough, tearing, twisting, pressing, picking up | When they do the movement without quickly tiring |
| A large tool | Control of grip and direction | Spoon, large tongs, sponge, brush | When they control the tool and hit a wide target |
| A broad drawing tool | Visual trace and wrist movement | Wide chalk, wax crayon, water brush | When they imitate big lines comfortably |
| A pen and lines | Precision and planning | Tapping, lines, circles, a wide maze | When they ask for a finer challenge without tension |
12 practical activities to strengthen hand muscles
1. Kneading modelling clay
Let your child press the dough with the palm, roll it into a cylinder, and pinch off small pieces. Start with soft, non-sticky dough. Use varied movements rather than making a beautiful shape; strength and coordination are the goal.
2. Tearing and sticking paper
Start with light paper with a small slit at the edge, then move to thicker paper. Your child holds the sheet with both hands and pulls in two directions. The scraps can be stuck inside a large shape, using a safe adhesive under supervision.
3. Squeezing a sponge
Put a little water in two bowls. Your child soaks up water with a sponge and then squeezes it into the other bowl. The activity strengthens the palm and grip, and teaches control of force. Do it on a tray and wipe the floor to avoid slipping.
4. Rolling socks
Choose clean socks and let your child gather each pair and then press or roll it into a ball. They don't need to fold precisely. This is a home activity with no special tools, and it uses both hands together.
5. Opening and closing lids
Use large, clean containers with easy lids, with no glass or edges. Secure the container first, then let your child turn the lid. Different sizes train the wrist and hands, but avoid small lids for a child who puts things in their mouth.
6. Clothes pegs
Clip easy pegs around a cardboard plate or the rim of a basket. If the peg is strong, help your child or choose a lighter type. This movement strengthens the thumb and index finger, but it isn't suitable without supervision because the peg can pinch the skin.
7. Picking up with large tongs
Your child moves cloth balls or large pieces of sponge with wide children's tongs. Start with the hand if the tool is difficult, then help them open and close the tongs. Don't use beads or grains with a child who might swallow them.
8. Threading through large openings
Use a board with holes or large rings with a short, thick, age-appropriate lace. Pass one end through and then let your child pull it. Don't use a long cord, and stay close throughout the activity.
9. Building a tower and taking it down
Large blocks require control of force and wrist direction. Start with three blocks. After building, ask them to remove the top block without dropping the rest. Varying between building and taking apart is important.
10. Drawing on a vertical surface
Fix a large sheet to a washable wall or use a low board, and offer a wide wax crayon. Vertical drawing encourages shoulder steadiness and wrist movement. Make the movement space wide and don't ask for letters.
11. Finger tracing
Draw a wide path on paper, or use a tray with a thin layer of safe sand. Your child traces the path with their finger from start to finish. This links the eye to movement without the burden of holding a pen.
12. Lines with a wide crayon
Offer a short wax crayon or a wide pencil and ask them to imitate a vertical line, then a horizontal one, then a big circle. Use a wide page and only two or three attempts. If your child tenses their hand or refuses, go back to free drawing.
5 activities with almost no preparation
- Slowly opening and closing the fingers of the hand like “a flower opening”.
- Touching the thumb to each finger in turn.
- Picking up relatively large paper scraps and putting them in a basket.
- Pressing the palms together and then relaxing.
- Carrying a small cushion or a light book with both hands.
These activities need no equipment, but they shouldn't be forced exercises. Turn them into a short game and stop when your child loses interest.
A simple weekly plan
| Day | Strength activity | Precision activity | Duration |
|---|---|---|---|
| Saturday | Dough | Tearing and sticking | 10–15 minutes in total |
| Sunday | Squeezing a sponge | Lids | 10 minutes |
| Monday | Rest / free play | Free drawing | According to interest |
| Tuesday | Light pegs | Large tongs | 10 minutes |
| Wednesday | Blocks | Finger tracing | 10–15 minutes |
| Thursday | An activity your child chooses | Wide lines | 5–10 minutes |
| Friday | Rest | A story and turning pages | No training goal |
You don't need to stick to every day. Repeat the activity your child likes, and swap the movement if it causes tiredness. Quality and regularity matter more than the number of activities.
When do we ease the difficulty or stop?
- Your child complains of pain or keeps rubbing their hand.
- The fingers go white from pressing hard, or they grip the tool violently.
- They tire within a minute every time despite simplifying.
- They show growing frustration or refuse the activity for consecutive days.
- They use only one hand while the other seems weak or consistently not involved.
- Random movements increase when the pieces get smaller.
When they tire, enlarge the tool, reduce the repetitions, fix the paper, or go back to dough and hand activities. If the pain or a noticeable difference between the hands continues, ask for a professional assessment.
Common mistakes
- Correcting the pen grip every minute instead of improving comfort and strength.
- Starting with small pages and fine details before big drawing.
- Forcing your child to use a particular hand; hand preference becomes clear gradually.
- Comparing the quality of their lines with other children.
- Turning all play into a lesson or an assessment.
- Using small pieces unsuitable for the age on the pretext of training the fingers.
How do we adapt the activities by stage?
From 18 months to 3 years
Make the materials big, the steps few, and the time short. The priority is pressing, pulling, carrying and turning, while watching for things going into the mouth. Don't ask for precision within small limits, and don't use sharp tools, beads or loose buttons. Your child can draw with the movement of the whole arm on a large sheet.
From 3 to 5 years
Start adding tools such as large tongs and safe, age-appropriate scissors under supervision, wide paths, and finer building. Encourage using the helping hand to hold the paper or the bowl. Lines and circles can be imitated, but don't make the quality of the shape a condition for enjoyment.
From 5 years and up
Precision and duration can be increased gradually: cutting paths, narrower mazes, shaping letters in dough, or copying a short pattern. Keep up the strength exercises and big movement; a child who writes at school still needs play that protects the hand from strain and balances long sitting.
Sitting posture and setting up the space
The environment affects hand performance. Choose a chair that lets the feet rest on the floor or a footrest, and a table at a height that keeps the elbow at a comfortable angle. Put the paper in front of the working hand with a slight tilt, and let the other hand hold it. Good lighting and an uncluttered space reduce visual effort.
You can alternate between the table, drawing standing at a vertical surface, and working on the floor. Changing posture trains different muscle groups and avoids treating long sitting as a condition for learning. If your child slides off the chair or keeps raising their shoulders, adjust the height before judging their hand skill.
How do we monitor improvement over a month?
Choose two fixed activities and write a short weekly note instead of photographing every attempt. Watch: how long they go before tiring, how often they drop the tool, the ability to hold the paper, accuracy in reaching the target, and the pressure used. Progress may show in calmer movement or less requests for help, even if the line's shape doesn't improve quickly.
| Observation | What it might mean | A useful adjustment |
|---|---|---|
| Pressing very hard on the pen | Searching for stability, or an uncomfortable tool | A wide pen, a vertical surface, and dough-pressing activities |
| Moving the whole arm | The wrist and fingers are still developing | Big drawing, then gradual reduction |
| Switching hands quickly | Tiredness, or a hand preference not yet settled | A shorter session and not imposing a hand |
| The paper tears | Too much force, or thin paper | Heavier paper and wide wax drawing |
| Avoiding fine activities | A difficulty or a different interest | Fold it into a game they like and start with an easier task |
The role of language and encouragement
Use neutral description such as “You pressed the dough hard” or “You put three pieces in the bowl” instead of constant judgement like “excellent” and “wrong”. Description helps your child notice what they did and reduces their fear of the result. Offer two choices: “Do you want the dough or the sponge?” so they take part in the decision.
When they fail, don't redo the task for them straight away. Reduce it to one step or ask: “Shall I hold the paper for you?”. And when they finish, don't ask for an extra attempt if they seem tired. Stopping at the right time preserves their desire to come back.
When is a training book useful?
Once your child can draw freely and imitate simple lines without obvious fatigue, wipe-clean pages can add gradual practice. The organised educational books collection shows the available products and what each one does. The Horoofi Arabic Letters Book is a specialised option with 28 activity pages for tracing and writing the letters, Please check the product page for the current price and availability.
Don't make it the starting point just because of your child's age. If readiness isn't there, keep going with hands-on play. To tell motor readiness apart from broader readiness, see the signs that your child is ready to learn to write.
Frequently asked questions
At what age do I start?
Hand skills begin in infancy with grasping and releasing. Activities like dough, tearing and tongs are chosen according to your child's ability to use them safely, not according to a fixed age.
Must my child hold the pen with three fingers?
Not at the beginning. There are natural stages of pen grip. Focus on comfort, control and no pain, and offer wide tools and big drawing before details.
Is daily writing necessary?
No. Strength and coordination can be built from play and household chores. A few minutes of free drawing or lines are enough when your child is interested.
Summary
The road to writing passes through strength, coordination and steadiness before copying letters. Use finger activities first, then big tools, then drawing and lines. Watch for comfort, ease the difficulty when they tire, and keep the experience short and enjoyable. That way the pen becomes a natural step in the progression, not a source of pressure.

Comments are closed.