


Blog
A learning corner for children at home: a guide to space, tools and organisation
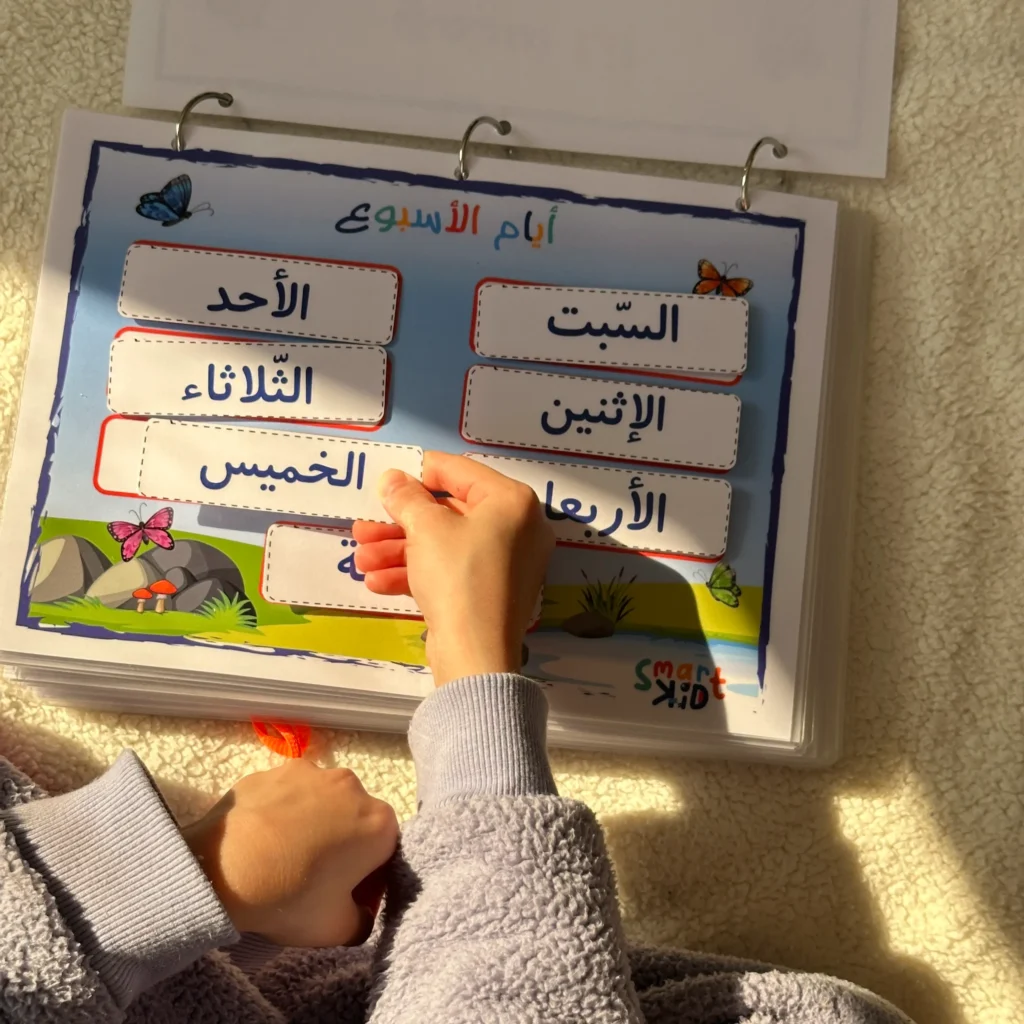
A learning corner for children at home doesn't need a separate room or expensive furniture. A safe place with good lighting, a comfortable surface and a limited number of tools your child can see and put back is enough. The quality of the corner shows in how easy it is to start and tidy up, not in how many materials it has or how it looks in photos.
This guide helps you choose the place, furniture and storage, determine the tools by age, and build a small corner on a modest budget, then rotate the content without clutter.
What is the function of a learning corner?
It's a clear spot for reading, drawing or a short activity, not a classroom inside the home. It can be part of the living room or a corner near the family table. The aim is for your child to know where to find the materials and where to return them, and for starting to be possible without long preparation.
The corner doesn't have to be used daily, and it shouldn't replace free play, movement and family time.
Choosing the place
- Away from a busy corridor and doors that open quickly.
- Close enough for adult supervision, especially for little ones.
- Not exposed to strong sun, heat or humidity.
- As far as possible from the TV and sources of constant noise.
- Has room to move around the chair or rug.
- Doesn't require climbing to reach the tools.
Observe the home at different times before moving furniture. A quiet corner in the morning may become a busy passage in the evening. Choose the time your child will use the corner most.
Lighting and visual comfort
Natural light is useful if it doesn't cause direct glare on the page. Position the work surface so your child's hand doesn't block the light, and add a fixed lamp that doesn't heat up and that your child can't easily knock over. Avoid wires stretched across the walkway.
Test the page from your child's eye level, not from where you stand. If the shadows are strong or the letters unclear, change the table's direction or the light source.
Surface and seating
You can use a table and chair of a suitable size, or the family table with comfortable support, or a defined rug for sorting and reading activities. The surface must be stable, your child able to put their feet or body down comfortably, and the materials within a safe range.
Don't buy new furniture before trying the space. An existing table may be enough. And if you use a shelf, secure it according to the safety instructions and don't put heavy things at the top.
Essential tools only
| Category | Starter tool | Storage place |
|---|---|---|
| Reading | Two or three books | A low, stable stand or shelf |
| Drawing | Paper and two age-appropriate pens | One closed box |
| Matching and sorting | One activity with large pieces | A clear tray |
| Writing or tracing | A book or a few sheets | A thin folder |
| Cleaning | A small piece of cloth | A dedicated container away from cleaning products |
Start with the fewest, then add a tool when you know where it will be kept and how it will be used.
Storage that helps your child
Use a box or tray for each type, with a simple picture if your child can't read. They should be able to see what's inside without emptying everything. Avoid a deep basket that mixes pens, cards, pieces and books; searching through it uses up the activity's energy.
- Everyday tools at reach level.
- Materials that need supervision in the adult's place.
- Missing or damaged pieces are checked straight away.
- Each activity returns complete to its container.
- Books are displayed with their covers showing if possible, rather than in a big pile.
How do we rotate the tools?
Display only 3–5 options: two books, a drawing tool, and one or two activities. Store the rest out of sight. Every week, or when interest fades, swap one item and leave something familiar. Don't change the whole corner at once.
Note what your child used and what they ignored. If an activity isn't used twice, try presenting it with a model or move it to storage. Don't buy a replacement straight away; perhaps the time or place isn't right.
A learning corner by age and readiness
| Stage | What we display | Precaution |
|---|---|---|
| A young child exploring | A sturdy book, large pieces and one activity | Supervision and no small pieces |
| Starting kindergarten | Drawing, matching, a story, big lines | Short instructions and limited choices |
| An older kindergarten child | Early writing, sequencing, puzzles and a short project | Cutting and gluing tools under supervision |
| More than one child | Separate trays and some shared tools | Roles and a space for each child |
A model for a very small space
Use a portable basket instead of a permanent corner: a folder of papers, a box of pens, two books and an activity tray. The basket is kept in the adult's place and put on the family table at the time of use. After the session it returns complete to its place.
The advantage of this model is that it needs no furniture, but the basket shouldn't be heavy or accessible without supervision if it contains unsuitable tools.
A model on a modest budget
Start with what you have: a sturdy shoebox for storage out of children's reach if it isn't safe to access, boxes without edges, scrap paper reused on the blank side, pictures from magazines, and socks for matching. Stick a picture card on each container.
Spend first on safety, durability and the tool that will be used a lot, not decoration. You don't need a sign with the corner's name or matching colours for it to work.
First week: a setup plan
| Day | Task |
|---|---|
| 1 | Choose the place and observe the light and movement |
| 2 | Set up a stable surface and test the seating |
| 3 | Add only a book and a drawing tool |
| 4 | Teach where each tool belongs and how to return it |
| 5 | Add one matching or sorting activity |
| 6 | Note what your child used |
| 7 | Remove the excess and settle the simple routine |
How do we introduce the corner to our child?
Take a short tour: “The books are here, the pens are here, and after the activity we put them back”. Choose one activity and present a model. Don't explain all the tools on the first day. Let your child choose a book or a colour, within safety limits.
If they use the corner in a different, safe way, watch before correcting. They may prefer reading on the rug and drawing at the table, and that's normal.
What if it turns into a mess?
Cut the options in half, make each box for one type, and check whether your child can open and close it. Tidy together after one activity instead of waiting for the end of the day. If they start throwing the tools, close the activity and store it temporarily.
Don't ask a young child to tidy dozens of pieces. Say: “You put the cards and I'll put back the pens”. Reduce your help gradually.
Linking the corner to the home routine
Choose a simple cue: after the snack or before the story. The session may be five minutes. Some days your child uses the corner alone under supervision, and other days they need you to take part. Don't make up for a missed day with a long session.
Ideas for short home activities help you change the content without buying anything new, and the guide to using it without pressure helps you end the session calmly.
Common mistakes
- Displaying all the toys and books at the same time.
- Choosing a beautiful place that's far from supervision.
- Buying furniture before trying the routine.
- Putting sharp or small tools within reach.
- Treating the corner as a punishment or only a place for homework.
- Changing the tools quickly before use has been repeated.
- Caring about decoration more than light, comfort and storage.
Final checklist
- The place is safe and close to supervision.
- The lighting is clear with no glare.
- The surface and seating are comfortable.
- Every tool has a known place.
- Dangerous materials are out of reach.
- The options are limited and rotatable.
- Your child knows how to start and how to finish.
If more than one child uses the corner
Allocate a space or tray for each activity, and leave some shared materials with a clear rule. The two children don't need to use the corner at the same time. One can choose reading and the other drawing, or they can swap after a short while. Keep the tools suited to the older child out of the younger one's reach.
Use colour markers instead of writing the name only, and don't make everything individual; a story book can be shared, while a worksheet or a box of pens may need separate organising. An adult's involvement at the start prevents tug-of-war over pieces and explains the roles.
Walls and decoration: what do we display?
Keep the background calm. A small routine card or a work your child chooses is better than dozens of stickers and letters. Hang materials at their eye level using a safe fixing method, away from pins or detachable pieces. Swap what's displayed instead of adding new layers.
If you use a board to display work, ask your child what they want to keep. Photograph some pages, then recycle the paper when appropriate, instead of the corner becoming a store of old work.
How do we account for differences in sensitivity to the place?
Some children are distracted by many colours, sounds or a particular texture, and some need movement before sitting. Watch the response without diagnosing. Choose a comfortable chair or rug, reduce the visuals, keep scented items away, and allow a movement break between two activities.
If they keep refusing the corner, try another place or a portable basket. The aim isn't to force them into a specific corner but to make it easy to reach a suitable experience.
Weekly corner maintenance
- Check the pens, pieces, edges and wear.
- Return any incomplete activity to storage until it's complete.
- Wipe the surface without leaving cleaning products in the corner.
- Rotate only one book or activity.
- Get rid of papers your child doesn't want to keep.
- Check the stability of the shelves, wires and lighting.
Maintenance takes minutes if the materials are few. When organising becomes a burden, that's usually a sign the corner holds more than it needs.
When do we change the corner's location?
Change it if the passage becomes crowded, if your child's sleep and the family routine change, if the lighting is no longer suitable, or if the younger child needs a safer space. Move the essential tools first and try for a week before buying furniture that fits the new place.
Frequently asked questions
Does the corner need a separate room?
No. A small corner or a portable basket may be enough.
How many tools do I display?
Start with three to five options, and reduce them further for little ones or when distraction is a problem.
Do I put all the books on the shelf?
Display a few and rotate the rest, keeping the favourite books.
When do I buy ready-made tools?
After defining the goal, the space and the way of storing. Choose one category according to need, not a random bundle.
Summary
Choose a safe, bright place, use an existing surface, then add two books, a drawing tool and one activity. Rotate the materials and remove the excess. If you need a ready-made material after trying the corner, compare one option that suits the age instead of filling the space.

Pingback: How toys progress for a child in the first two years: from Discovery to Skills
Pingback: Skills Box: toys for a child from 12 months and how to present them
Pingback: Educational toys for 6 to 12 months: how to choose?
Pingback: Choosing a toy box suitable for your child's age | Smart Kid
Pingback: Montessori Activities for Two-Year-Olds at Home: Safe and Simple Ideas
Pingback: 10 Home Activities for Children with Simple Tools and a Weekly Schedule